Introduction
Tailoring Your Ride with Darefore
Darefore revolutionizes cycling performance by providing real-time, in-depth position tracking. But to truly unlock its potential, you need to ensure the data reflects your unique riding style and bike setup. That’s where Darefore’s custom position feature comes in.
Imagine receiving precise feedback tailored to your specific bike’s geometry and your preferred riding positions. This is no longer a dream but a reality with Darefore. By setting up custom positions, you will gain the most accurate data possible, optimizing your performance and maximizing your efficiency on every ride.
This guide will walk you through the simple steps of creating and utilizing custom positions within the Darefore app. Whether you are a seasoned pro or a weekend enthusiast, this feature will help you fine-tune your ride for peak performance.

Why Custom Positions Matter
Unlocking Your Performance Potential
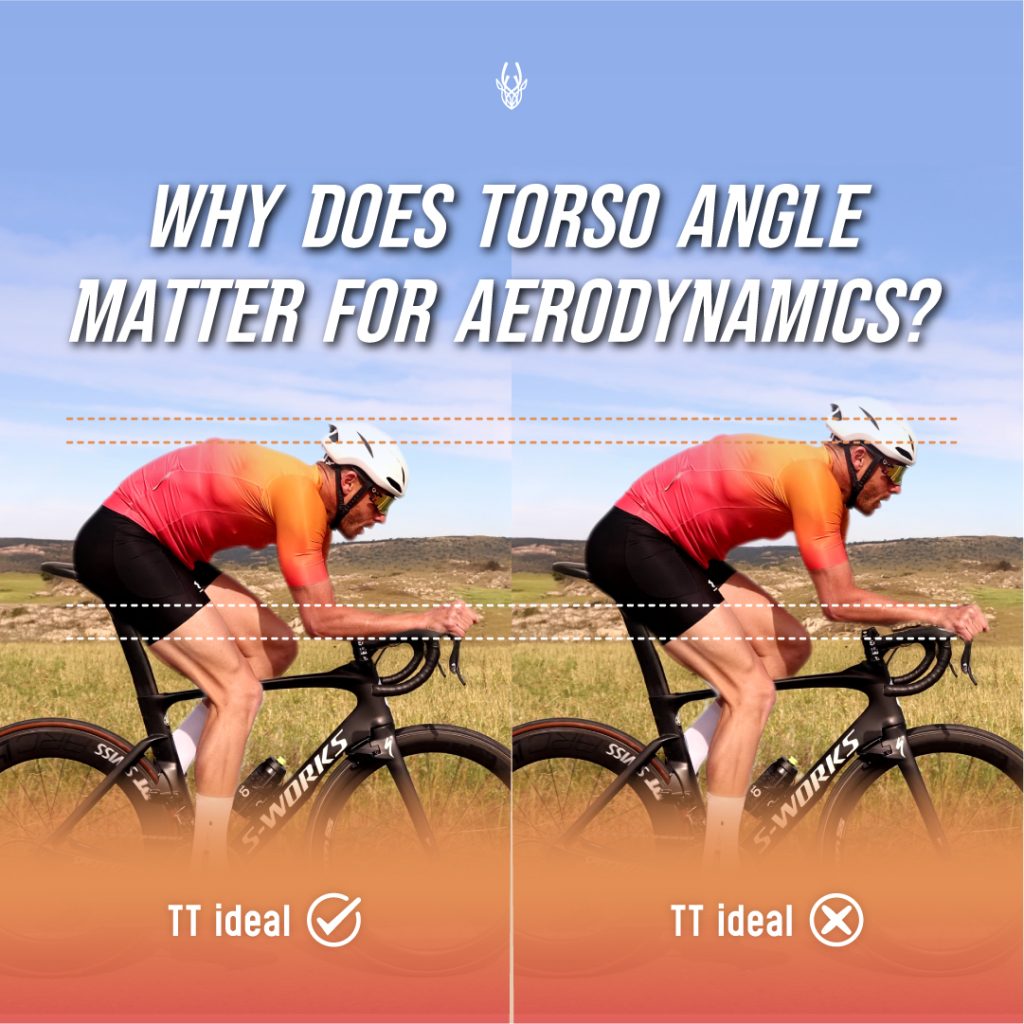
In the world of cycling, especially when pushing for optimal performance, one size definitely does not fit all. Your body type, riding style, and even the type of cycling you engage in significantly impact your ideal aerodynamic position. This is why Darefore’s custom positions are so important. They allow you to tailor the data to your specific needs, providing insights that are truly relevant to your unique ride.
Think about it: a time trial specialist will have a dramatically different riding position than someone tackling a mountain climb. Darefore’s custom positions allow you to set distinct parameters for each scenario, ensuring the feedback you receive is accurate and actionable.
Even seemingly minor adjustments to your riding position can have a substantial impact on your drag coefficient. By accurately tracking and analyzing these nuances, Darefore empowers you to fine-tune your setup for maximum efficiency.
Beyond pure performance, custom positions play a vital role in preventing strain and discomfort. By optimizing your position, you can minimize stress on your body, reducing the risk of injuries and allowing you to ride longer and stronger.
Ultimately, the goal is to ride faster with less effort. Darefore’s custom positions help you achieve this by providing the data you need to optimize your position, leading to increased efficiency and speed.
Furthermore, by saving and comparing data from different custom positions over time, you can track your progress and identify trends. This allows you to make informed decisions about your training and refine your position for continuous improvement. Darefore is not just about tracking; it is about understanding and optimizing your specific ride.
How Custom Positions Enhance Your Ride
How Custom Positions Enhance Your Ride
Darefore’s custom positions are not just for initial setup; they are dynamic tools you can use throughout your training and racing, allowing you to fine-tune your performance for various riding styles.
Switching Between Saved Positions
Once you have calibrated your custom positions for each bike, switching between them is seamless. This allows you to instantly adapt to different bikes or riding styles. For example, you might have saved positions for your road bike, your TT bike, or your gravel bike. Within each of those bike profiles you have the ability to select from ‘Comfortable’, ‘Aggressive’ (road bikes only), and ‘TT’ (aero) positions. With a few taps in the Darefore app, you can switch between these bike profiles and riding positions, ensuring accurate data tracking for each phase of your ride.
Using Custom Positions for Different Training Scenarios
Consider a training day that includes both endurance and high-intensity intervals on your road bike. You can use your ‘Comfortable’ position during the endurance phase, focusing on sustainable power output and comfort. As you transition to the interval segments, switch to your ‘Aggressive’ position to analyze your aero efficiency and power output at higher velocities. If you are adopting an aero position on your road bike, either with or without aero bars, you can also use your calibrated ‘TT’ position. This allows for targeted training and precise data analysis for each specific scenario.
Refining Positions Over Time
Darefore’s ability to save and compare data from different riding positions over time is invaluable for refining your technique. By analyzing trends and identifying areas for improvement, you can make informed adjustments to your positions. For example, if you notice a consistent drop in efficiency during long TT/Aero intervals, you can experiment with subtle position changes within your TT preset and analyze the impact on your performance.
Using Positions During a Race
During a race, precision is paramount. Darefore’s preset positions ensure you are receiving accurate, real-time feedback tailored to the specific demands of the course. For example, if you know a particular section of the road race involves a long, flat sprint, you can switch to your ‘Aggressive’ position to maximize your aero efficiency. If you are adopting an aero position on your road bike, either with or without aero bars, or racing on a TT bike, you can use your ‘TT’ position. This ensures that you are getting the most accurate data at the most critical moments, giving you a competitive edge.
By leveraging Darefore’s custom positions, you can transform your training and racing into a data-driven, highly optimized experience.
Preparing Your Bike for Calibration
Now that you understand the power of custom positions, let’s get your bike ready for calibration. To ensure accurate data, a stable and level surface is essential. Any movement during the calibration process can introduce errors, compromising the precision of your Darefore data.
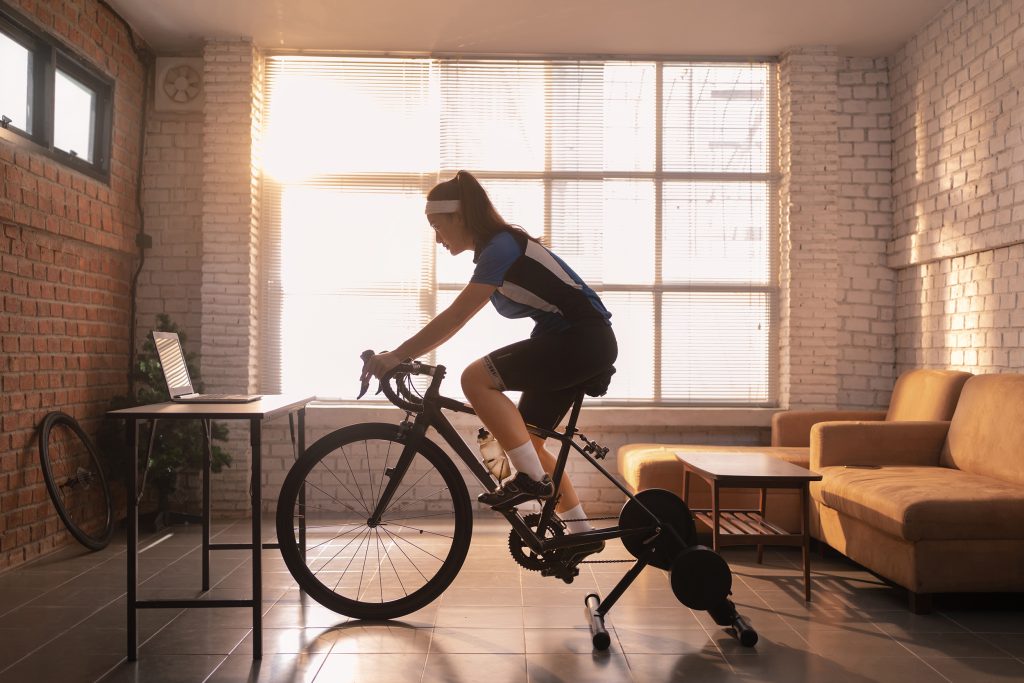
To minimize movement, we strongly recommend using a bike stand or a smart trainer. These tools provide the necessary stability to keep your bike perfectly still while you calibrate each position.
While Darefore’s default settings provide a good starting point, calibrating Darefore for each bike you plan to use it with is highly recommended. Cycling positions are influenced by a bike’s unique geometry, including frame size, handlebar setup, and saddle height. Calibrating each bike separately ensures that Darefore’s data reflects your individual riding style and setup on each of your bikes. This step will maximize the benefits of Darefore’s precision tracking and achieve the most accurate data for your specific setup.
The position Chart
With your bike securely mounted, it is time to navigate the Darefore app and select the bike you will be calibrating.
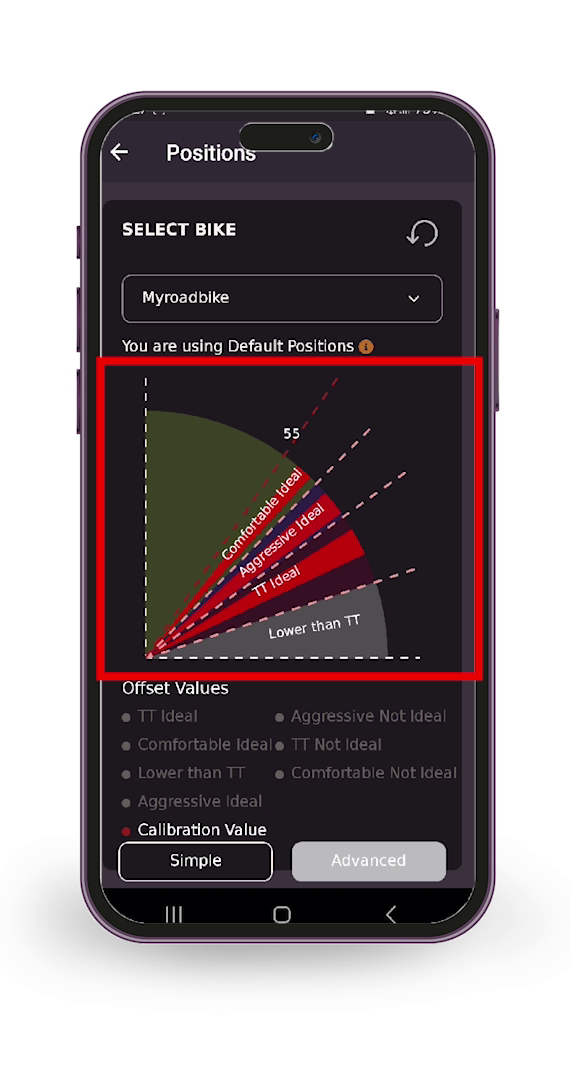
In the app, you will find a ‘Select Bike’ dropdown menu. If you haven not added your bike yet, you will need to do so. Once you have selected your bike, you might see a message stating, ‘You are using Default Positions.’ This indicates that Darefore is currently using its general position settings. To tailor the data to your specific bike and riding style, we will need to calibrate custom positions.
Once your bike is selected, you will see a circular chart. This chart visually represents the different cycling positions that Darefore tracks. These positions are:
- Comfortable: A relaxed position for endurance rides and general comfort.
- Aggressive (Road Bike Only): A more aerodynamic position for road bikes, typically used during high-intensity efforts.
- TT/Aero: A time trial or aerodynamic position, used for maximizing speed and efficiency.
- Lower that TT: This is not a position that you can set. It is only there to inform the rider, that they have exited the lower boundary of the non-ideal TT position.
Simple Calibration
Darefore offers two calibration options: Simple Calibration, also known as the Position Wizard, and Advanced Calibration. For most users, Simple Calibration is the recommended starting point. It is a guided, step-by-step process that makes setting up your custom positions quick and easy.
Step 1: Connecting Your Sensor
Before you begin, ensure your Darefore sensor is connected to the app. The app will guide you through this process if it is not already connected.
Step 2: Calibrating the Straight Arms Position
The first step is to calibrate the Straight Arms position. This is a baseline measurement that Darefore uses for reference. Get into a relaxed, upright position with your arms straight down at your sides. Once you are stable, tap the ‘Ready’ button. Remain still while the app takes the measurement.
Step 3: Calibrating the Comfortable Position
Next, move into your comfortable riding position. This is the position you typically use for endurance rides and general comfort. Once you are stable, tap ‘Ready.’ After the measurement, you will have the option to accept or cancel the calibration. If you are not satisfied with the result, tap ‘Cancel’ and retry.
Step 4: Calibrating the Aggressive Position (Road Bike Only)
If you are calibrating a road bike, you will then proceed to the Aggressive position. This is a more aerodynamic position used for high-intensity efforts. Move into position, and tap ‘Ready.’ If the calibration looks correct, tap ‘Accept.’
Step 5: Calibrating the TT position
Finally, move into your Time Trial/Aero position. This is your most aerodynamic position, used for maximizing speed and efficiency. If you are have aero bars, you can use them. Tap ‘Ready,’ and if the calibration looks correct, tap ‘Accept.’
Step 6: Reviewing Calibrated Ranges
Once all positions are calibrated, the app will display the calibrated ranges for each position. You can tap the name of a specific position below the chart to toggle the visibility of its detailed degree range. This provides a more precise understanding of the ideal range for that position.
By following these steps, you will have successfully calibrated your Darefore sensor using the Simple Calibration and be ready to start tracking your position data
Understanding Calibrated Ranges
After completing the Simple Calibration (Position Wizard), the Darefore app presents you with the calibrated ranges for each of your selected positions. This is where you can see the specific degree ranges that the app will use to determine whether you are in an ideal or non-ideal position during your rides.
The calibrated ranges are displayed in two ways:
Visual Chart
- The circular chart you saw during the calibration process now displays the calibrated ideal degree ranges for each position.
- The red sectors, representing the ideal ranges, are now set based on your specific calibration.

Detailed Degree Ranges
- Below the circular chart, you will see a list of the calibrated positions (Comfortable, Aggressive, TT/Aero).
- Tapping the name of a specific position in this list toggles the visibility of its detailed degree range.
- This detailed view shows the exact minimum and maximum degree values that define the ideal range for that position.
This detailed view is essential for understanding the precise parameters that Darefore will use to analyze your riding position. By understanding these calibrated ranges, you can:
- Gain a clearer understanding of your optimal body angles.
- Compare your actual riding position to the calibrated ranges.
- Make informed adjustments to your riding technique to stay within the ideal ranges.
This level of precision ensures that Darefore provides you with accurate and actionable feedback, helping you optimize your performance.
Advanced Calibration
For cyclists seeking ultimate precision and control over their position tracking, Darefore offers Advanced Calibration. This feature allows you to manually adjust the ideal degree zones for each position in increments of 0.5 degrees, providing a level of customization beyond the Simple Calibration.
Accessing Advanced Calibration
To access Advanced Calibration, navigate to the calibration settings within the Darefore app and select ‘Advanced Calibration’.
Adjusting Minimum and Maximum Boundaries:
In the Advanced Calibration interface, you will see a list of your calibrated positions. Selecting a position, such as ‘Aggressive Ideal’, allows you to adjust its minimum and maximum boundaries. You can increase or decrease these values in 0.5-degree increments.
Setting Non-Ideal Boundaries First
It is crucial to understand the relationship between ideal and non-ideal boundaries. The boundaries of ideal positions cannot exceed the boundaries of the non-ideal part of that position. Furthermore, the boundaries of a non-ideal position cannot overlap with the ideal boundaries of another position.
Therefore, we recommend adjusting the non-ideal boundaries first. This ensures that you maintain a logical and consistent range for your ideal positions.
After making your adjustments, do not forget to tap the ‘Save’ button. Failing to save your changes will result in the loss of your fine-tuned settings.

Why Use Advanced Calibration?
Advanced Calibration is ideal for:
- Experienced Cyclists: Those with a deep understanding of their riding positions and data.
- Fine-Tuning for Specific Races: Adjusting positions for courses with unique demands.
- Experimenting with Subtle Changes: Making incremental adjustments to optimize performance.
By mastering Advanced Calibration, you can unlock the full potential of Darefore’s position analysis and achieve the ultimate level of precision in your training and racing.
Maximizing Your Position Analysis with Darefore
By now, you have learned how to harness the power of Darefore’s custom position features, from simple calibration to advanced fine-tuning. Let’s recap the key benefits:
- Personalized Data: Custom positions tailor Darefore’s analysis to your unique body type, bike setup, and riding style, ensuring accurate and actionable insights.
- Enhanced Performance: Optimizing your position leads to reduced drag, increased efficiency, and ultimately, faster speeds.
- Injury Prevention: Custom positions can help minimize strain and discomfort, allowing you to ride longer and stronger.
- Data-Driven Training: Saving and comparing data from different positions enables you to track your progress and make informed decisions about your training.
Remember, proper configuration is key to unlocking the full potential of Darefore. By taking the time to calibrate your positions accurately, you will receive valuable feedback that will help you refine your technique and achieve your performance goals.
We encourage you to experiment with different positions and fine-tune your settings to find what works best for you. Darefore is a powerful tool for self-discovery and improvement. Embrace the data and use it to elevate your riding to the next level.
Ready to experience the benefits of personalized position analysis?
Order your Darefore Position Sensor today.
Unlock your optimal aero and take your riding to the next level.